Welcome to the wonderful world of seed starting! There’s something incredibly satisfying about nurturing tiny seeds into vibrant plants, and one of the best ways to kickstart this journey is by planting seeds in pots. Whether you’re an experienced gardener or just starting, this comprehensive guide is here to help you succeed.
Creative Ways to Planting seeds in pots
In the following sections, we’ll cover everything you need to know about planting seeds in pots, from selecting the right containers and soil mix to providing optimal growing conditions and transplanting seedlings. So, roll up your sleeves, and let’s dive in!
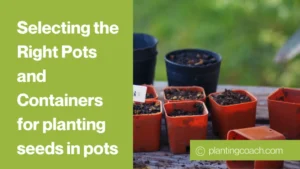
1. Selecting the Right Pots and Containers for planting seeds in pots
Choosing the perfect pots or containers is the first step in setting your seeds up for success. Considerations such as size, material, and drainage play crucial roles in providing an ideal environment for seed germination and early growth.
Firstly, opt for spacious containers to accommodate your plants’ root systems as they grow. While small pots may seem convenient initially, they can quickly become overcrowded, leading to stunted growth and competition among seedlings. Aim for pots with a diameter of at least 3 to 4 inches to allow ample room for root development.
Secondly, pay attention to the material of the containers. Porous materials like clay or terracotta pots allow for better airflow and moisture regulation, promoting healthier root systems. However, plastic pots are lightweight, durable, and retain moisture well, making them suitable for beginners or those with limited gardening experience.
Lastly, ensure that your pots have adequate drainage holes at the bottom to prevent waterlogging, which can lead to root rot and other fungal diseases. If using containers without drainage holes, consider adding a layer of gravel or perlite at the bottom to improve drainage.
By carefully selecting the right pots and containers, you’ll create an optimal environment for your seeds to thrive and flourish.
2. Choosing the Ideal Soil Mix for planting seeds in pots
The soil mix you use for planting seeds in pots is crucial for providing nutrients, moisture retention, and aeration essential for seed germination and early growth. Here’s how to select the perfect soil mix for your seed-starting endeavors.
Firstly, opt for a lightweight, well-draining soil mix specifically formulated for seed starting. These mixes are typically composed of a blend of peat moss, perlite, vermiculite, and compost, providing a balanced environment for seeds to thrive.
Alternatively, you can create your own soil mix by combining equal parts of peat moss or coconut coir, perlite, and compost. This DIY approach allows you to customize the soil mix to suit the specific needs of your plants and ensures aeration and drainage.
Avoid using garden soil or heavy potting mixes, as they can compact easily and impede root growth. Additionally, garden soil may contain pests, diseases, or weed seeds that can harm your delicate seedlings.
Before planting your seeds, moisten the soil mix thoroughly to ensure uniform moisture distribution. This will create an optimal environment for seed germination and encourage healthy root development from the start.
By choosing the right soil mix, you’ll provide your seeds with the best possible start, setting them up for success as they grow into robust, flourishing plants.
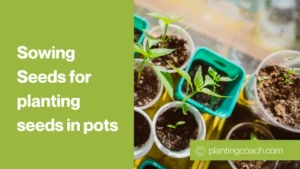
3. Sowing Seeds for planting seeds in pots
Sowing seeds is a delicate process that requires attention to detail to ensure even germination and healthy seedling growth. Follow these steps for successful seed sowing in pots:
Begin by filling your selected pots or containers with the chosen soil mix, leaving about half an inch of space at the top to allow for watering.
Next, carefully sprinkle or place the seeds on the soil surface according to the recommended spacing for the specific plant variety. Larger seeds may require gentle pressing into the soil, while smaller seeds can simply be scattered evenly.
Once the seeds are in place, lightly cover them with a thin layer of soil mix to the depth specified on the seed packet. Some seeds may require exposure to light for germination, so be sure to research the specific requirements of your chosen plants.
After sowing, gently water the pots using a fine mist or a watering can with a rose attachment to avoid disturbing the seeds. Keep the soil evenly moist but not waterlogged to prevent rotting.
Finally, label each pot with the plant variety and the date of sowing to keep track of your seeds as they germinate and grow. Place the pots in a warm, well-lit area and wait patiently for signs of new life to emerge.
4. Watering Techniques
Proper watering is essential for seed germination and seedling growth, but it’s easy to overdo it and cause more harm than good. Follow these watering techniques to ensure your seeds get just the right amount of moisture:
Start by using a watering can with a fine rose attachment or a spray bottle to gently moisten the soil surface after sowing seeds. Avoid using a strong stream of water, as this can dislodge seeds or create uneven moisture distribution.
Monitor the moisture level of the soil regularly and water as needed to keep it consistently moist but not waterlogged. A good rule of thumb is to water when the top inch of soil feels dry to the touch.
When watering, aim to moisten the entire soil surface evenly, ensuring that all seeds have access to water for germination. Be careful not to water too heavily, as this can lead to compaction of the soil and hinder seedling growth.
Consider bottom watering as an alternative technique, especially for pots with good drainage. Place the pots in a tray of water and allow them to absorb moisture from the bottom, ensuring thorough hydration without disturbing the seeds or soil surface.
By mastering these watering techniques, you’ll provide your seeds with the perfect amount of moisture for successful germination and healthy seedling development.
5. Providing Optimal Growing Conditions
Creating the right environment for seed germination and seedling growth is crucial for ensuring healthy and robust plants. Here’s how to provide optimal growing conditions for your seeds:
1. Light:
Place your pots in a location with plenty of natural light, such as a south-facing windowsill. If natural light is limited, supplement with artificial grow lights to provide the necessary light intensity for seed germination and early growth.
2. Temperature:
Most seeds prefer warm soil temperatures for germination. Maintain a consistent temperature range of 65 to 75 degrees Fahrenheit (18 to 24 degrees Celsius) during the day and slightly cooler temperatures at night. Consider using a heat mat to provide bottom warmth for seeds that require higher temperatures for germination.
3. Humidity:
Seedlings benefit from higher humidity levels during the germination stage. Use a humidity dome or cover the pots with plastic wrap to create a humid microclimate around the seeds. Remove the cover once seedlings emerge to prevent mold and fungal growth.
4. Air Circulation:
Adequate air circulation is essential for preventing damping off and promoting strong, healthy seedlings. Use a small fan to gently circulate air around the seedlings, or open windows periodically to allow for natural ventilation.
By providing the right balance of light, temperature, humidity, and air circulation, you’ll create an optimal growing environment that encourages successful seed germination and vigorous seedling growth.
6. Monitoring Seedling Growth
Monitoring seedling growth is an important aspect of successful seed starting, allowing you to identify and address any issues early on. Here’s how to effectively monitor your seedlings:
1. Observation:
Regularly inspect your seedlings for signs of health or problems, such as yellowing leaves, stunted growth, or wilting. Look for any signs of pests or diseases, such as aphids or fungal infections, and take appropriate action if necessary.
2. Watering:
Pay close attention to the moisture level of the soil and adjust your watering schedule as needed. Avoid overwatering, which can lead to root rot, and ensure that the soil is consistently moist but not waterlogged.
3.Thinning:
As seedlings grow, thin them out to prevent overcrowding and competition for resources. Remove the weakest or smallest seedlings, leaving behind the strongest and healthiest ones to thrive.
4.Support:
Provide support for tall or leggy seedlings by gently staking them with bamboo skewers or small stakes. This will prevent them from bending or breaking as they continue to grow.
By actively monitoring your seedlings and addressing any issues promptly, you’ll give them the best chance of thriving and developing into healthy, robust plants.
7. Transplanting Seedlings for planting seeds in pots
Transplanting seedlings from pots to larger containers or the garden is a critical step in their growth journey. Here’s how to do it successfully:
1.Timing:
Wait until seedlings have developed their first set of true leaves before transplanting, usually about 2-3 weeks after germination. This ensures that they have a strong root system to support transplanting.
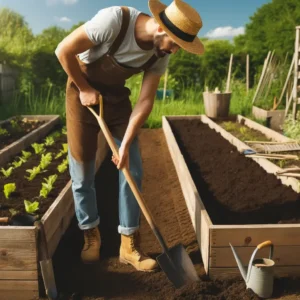
2. Preparing the New Location:
If transplanting seedlings to the garden, prepare the planting area by loosening the soil and adding organic matter, such as compost or aged manure, to improve soil fertility and structure.
3. Gentle Handling:
Carefully remove seedlings from their pots by gently loosening the soil around the roots. Handle them by the leaves or root ball to avoid damaging delicate stems.
4.Planting Depth:
Plant seedlings at the same depth as they were in their pots, making sure to firm the soil around the roots to eliminate air pockets.
5. Watering:
After transplanting, water the seedlings thoroughly to help them settle into their new environment and reduce transplant shock.
6. Protection:
Protect newly transplanted seedlings from harsh sun, wind, and pests by providing shade, windbreaks, and physical barriers if necessary.
By following these steps, you’ll ensure a smooth transition for your seedlings and give them the best chance of thriving in their new home.
Conclusion:
Congratulations! You’ve now mastered the art of planting seeds in pots and nurturing them into healthy seedlings ready for transplanting. By following the steps outlined in this guide, you’ve provided your seeds with the best possible start in life, setting them up for success as they continue to grow and flourish.
Remember, seed starting is both a science and an art, and each gardener’s journey is unique. Don’t be afraid to experiment, learn from your experiences, and adapt your techniques along the way. Whether you’re growing flowers, herbs, or vegetables, the satisfaction of watching your seeds sprout and thrive is unmatched.
As you continue your gardening adventure, don’t hesitate to reach out to fellow gardeners for advice, share your successes and challenges, and celebrate the joys of growing your own plants from seed. Gardening is a journey of discovery and connection, and your seeds are just the beginning of a beautiful and bountiful harvest.
Happy gardening, and may your pots be filled with abundance and beauty!

6 thoughts on “Creative Ways to Planting seeds in pots for a Lush Garden in 2024”